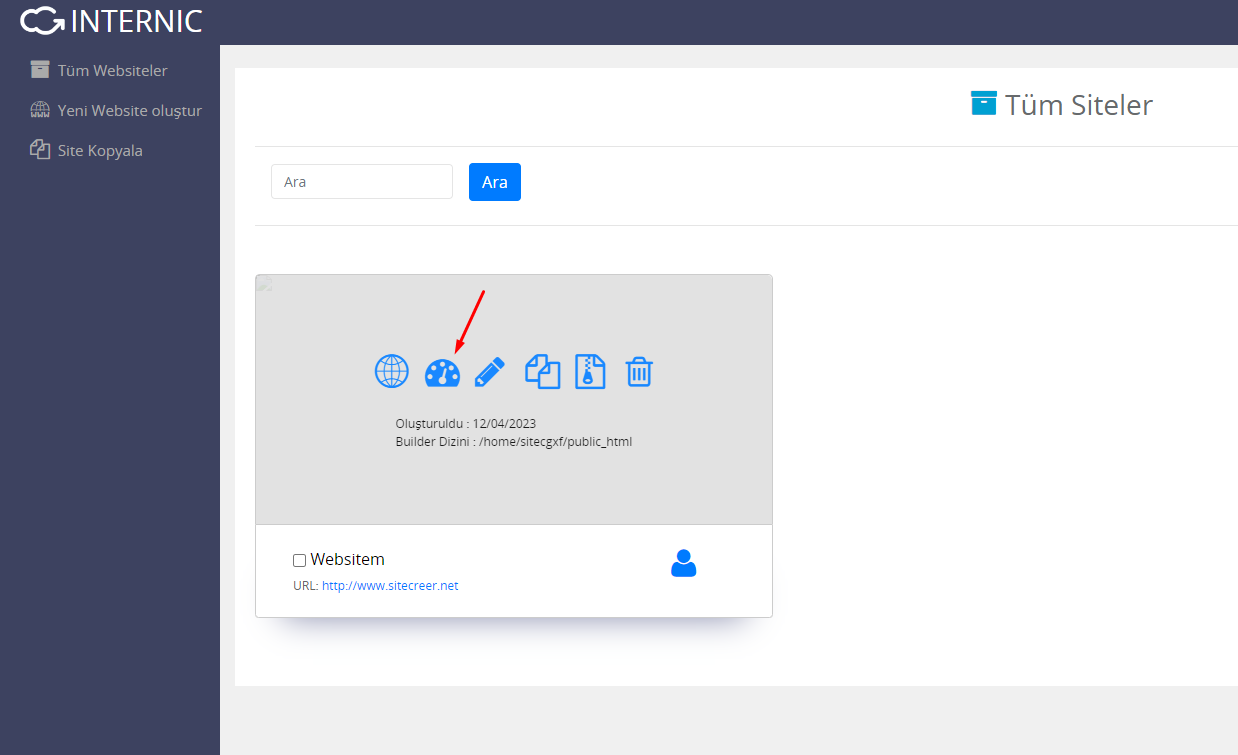
To add a new blog post, you need to log in to the control panel of your Website Builder service. Please log in to the control panel first. Then, proceed to the page where you can make detailed edits to your site through the Inspect Your Website icon as shown in the image below.

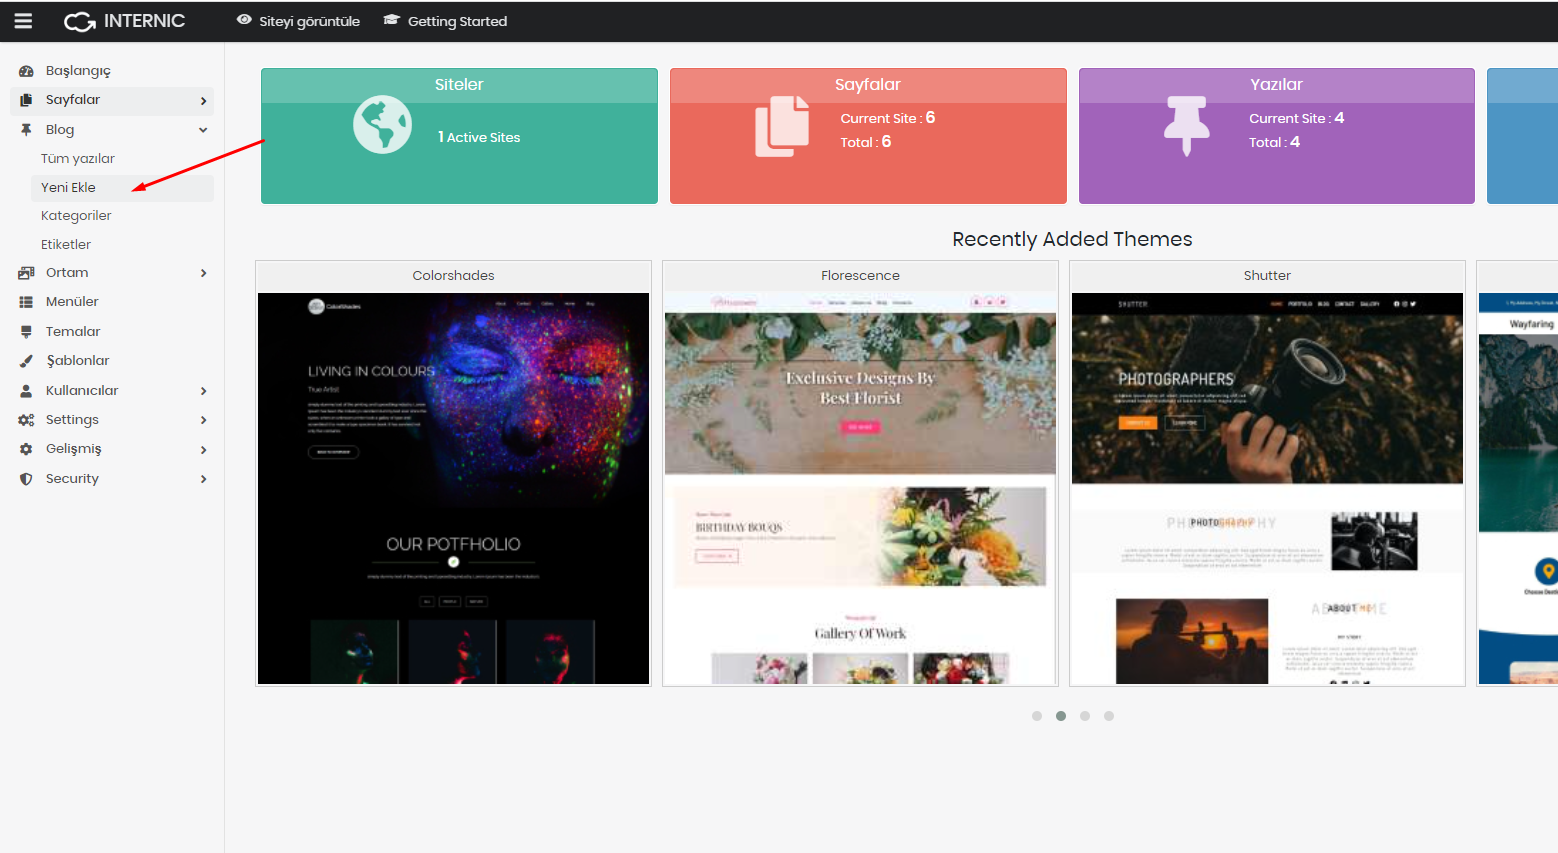
After clicking on this icon, you will be directed to the site's management page. In the site management page, click on Blog > Add New button on the left menu. After this process, the system will redirect you to the page where you can create your new blog post.

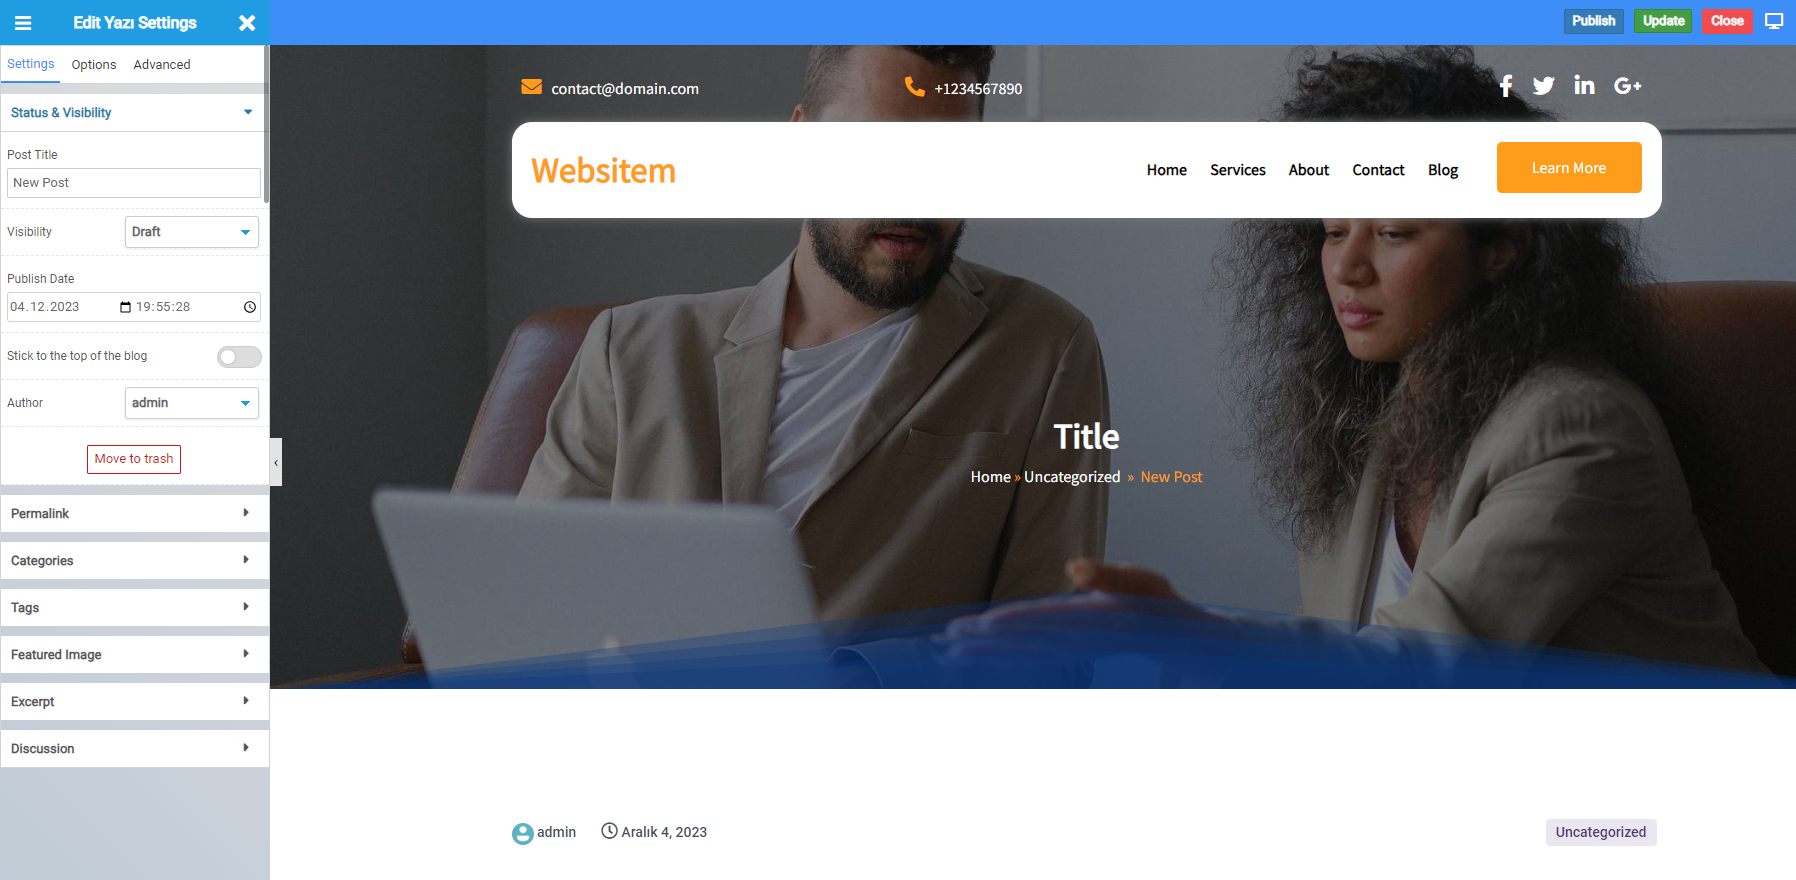
In the page that appears, you can make detailed settings for your new blog post from the left and top menu.

On this page, you can edit the Page Title, URL, page image, font style, and many other settings using the Page Editing tool on the left. After completing the editing of your page, you can share it by clicking the Publish button in the top right corner.